This blog documents the restoration of my 1859 Erard grand piano. A note to Erard restorers: I am seeking to correspond with other Erard restorers and owners to share information on these instruments. Please contact me if you wish to start an online discussion group.
Tuesday, August 15, 2006
Damper Restoration
Lunch for Bugs!!! The moths got to these old dampers. The numbers are my notations before disassembly. The darker dampers appear to be from the 1957 restoration. The '57 restoration was obviously quality work, but too much time has passed. The white dampers are obviously more recent--the craftsmanship on the more recent repairs is dismal.
More filth here...that red felt on the bottom rail is almost entirely gone from moth damage.
The damper frame completely stripped bare, with my beer in the corner.
New dampers going back in...
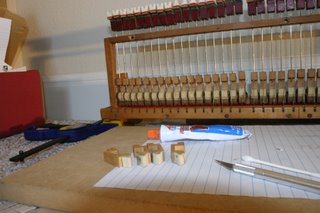
Making repairs to the sostenuto tabs where they meet the damper levers. There is no pin at the juncture, just a piece of buckskin glued on both pieces. This was a very time-consuming part of the operation.
Here is the completed assembly, ready to be reinstalled.
Monday, August 07, 2006
Veneer Repairs on Legs
Here is one of the legs--the metalwork is all done, so I moved on to the veneer repairs. If you recall, these were BAD, so I just sanded the old veneer to removed the high and low points, filled the gaps with wood filler and then veneered over the old wood. This wood is walnut, while the rest of the piano is rosewood. The grain is a good match, though, and I have pre-tested the color.
Here it is finished, with the new caster, and the ferrule polished like glass. The finish is minwax red mohogany and Jacobean colors layered until very dark, and 6 coats of polyurethane.
Voila!
Finally, I have finished with the key tops. This got REALLY boring by the last one. A very tim-consuming job, but the results were spectacular.
Friday, August 04, 2006
Piano Leg Restoration
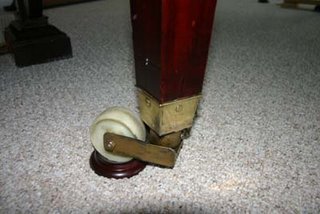
Look at this caster--this is wrong on so many levels. First, look at it bend--physics is winning the battle against this caster, and the only thing holding the caster and ferrule on to the leg are four very overworked screws. Next, look at the color of the lower part--the ferulle is brass, and polishes nicely, but the arm on the caster is steel with brass paint. These were totally homemade by some amateur in a machine shop.
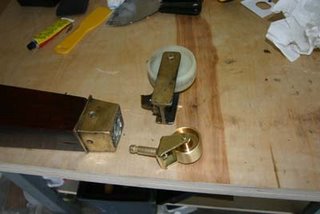
Here you can see the caster assembly. The assembley is very heavy and the ferrule (which I want to use) is welded to the caster. I had to cut the ferrule away with an angle grinder.
Here is the ferrule detached from the caster, and the new caster that will go into the leg. The bummer of this job is that it's noisy, messy, and I have to do it two more times for the two other legs.
Subscribe to:
Posts (Atom)